The Ultimate Guide to Perfecting Your DIY Manicure at Home
Discover easy steps to elevate your DIY nail game and master how to do your nails at home! Whether you prefer a natural look or an elaborate design, this guide offers practical tips to get started.
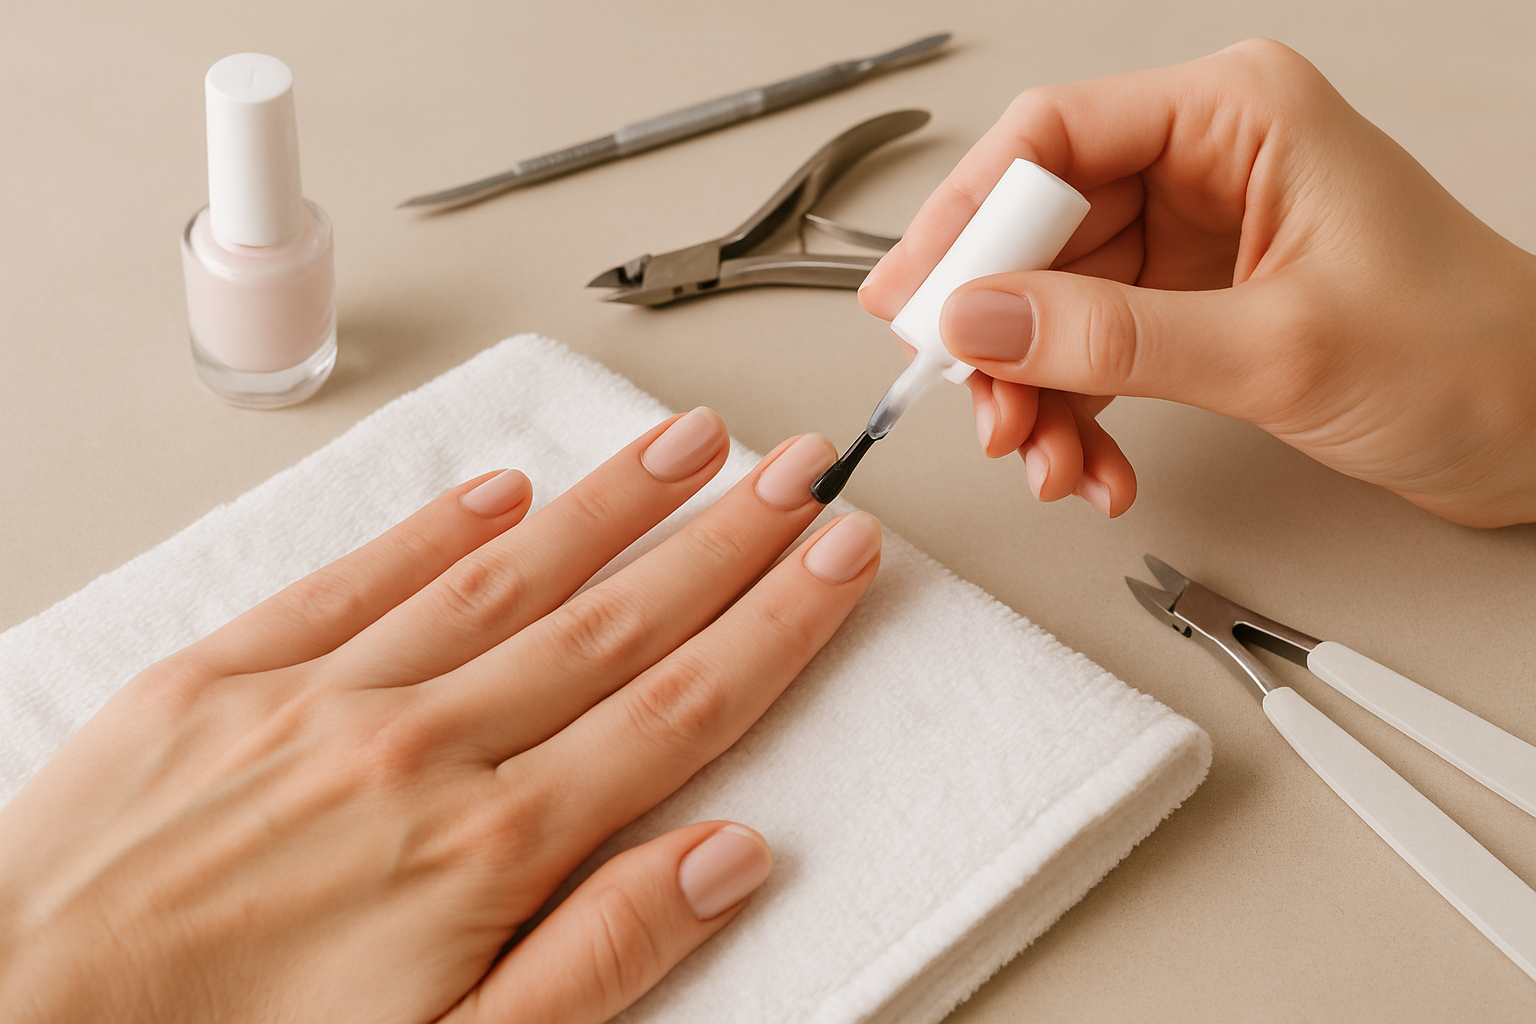
Gathering Your Tools and Materials
Doing your nails at home can be a relaxing and rewarding experience. It requires a few essential tools and materials to ensure a professional-looking finish. Here's what you'll need to get started:
- Nail Polish Remover: Use an acetone-based remover for removing gels and stubborn polishes or a non-acetone one for standard colors.
- Emery Board or Nail File: Choose a file with a high grit number for smooth, fine finishes.
- Nail Clippers: Invest in a quality pair to trim nails to desired length efficiently.
- Cuticle Pusher and Nippers: Keep cuticles tidy and avoid any ragged edges.
- Base and Top Coat: A good base and top coat help protect nails and polish, ensuring longevity and shine.
- Nail Polish: Select a color that suits your style or the occasion.
- Cuticle Oil or Cream: Hydrates nails and surrounding skin, preventing breakage and peeling.
It's crucial to gather all your materials beforehand to have a seamless nail-painting experience without interruptions.
Maintaining a Clean Workspace
Creating a clean and organized space is an often-overlooked step but it's vital for efficient nail care. Here are a few setup tips:
- Choose a well-lit area to avoid eye strain and ensure accuracy in polish application.
- Lay out materials on a clean table or vanity. Absorbent towels can catch spills or drips.
- Have a small trash nearby for easy disposal of used cotton balls, tissues, or trimmed nails.
Step-by-Step Nail Painting Process
Now that your tools are ready, it's time to dive into the painting process. Follow these detailed steps for a flawless application:
Step 1: Prepare Your Nails
Begin by removing any old polish using a saturated cotton ball. Gently press onto each nail for a few seconds before wiping away. Follow by washing hands thoroughly with soap to remove remover residues and dirt.
Step 2: Shape and Trim
Using your nail clippers, trim nails to desired lengths. Next, file edges with an emery board in one direction to avoid splitting. Opt for a rounded shape as it’s less prone to chipping.
Step 3: Cuticle Care
Soak your nails in warm, soapy water to soften cuticles. After a few minutes, gently push back the cuticles with a pusher. If necessary, trim away any excess dead skin using cuticle nippers.
Apply cuticle oil along the nail beds to moisturize and prevent dryness. Allure's guide confirms that regular cuticle care is essential for nail health.
Step 4: Base Coat Application
Apply a thin layer of base coat to each nail, which helps polish adhere better and prevents staining. Allow it to dry completely before moving on to color application.
Step 5: Applying Nail Polish
Choose your nail polish and apply a thin coat starting from the base, down the center, and up each side. If you make any mistakes, dip a small brush in remover and correct around the edges.
Let your nails dry for about two minutes before applying a second coat. This builds color density and ensures even coverage.
Step 6: Top Coat For Shine and Protection
Once your nail polish is dry, apply a top coat to seal and protect your design. A professional recommendation advises reapplying top coat every couple of days to maintain a glossy finish.
Troubleshooting Common Nail Issues
Bubbling or Smudging
If you notice bubbles forming in your polish, make sure you aren't shaking the bottle. Instead, roll it between your palms. Waiting adequate drying time between coats can also prevent smudges.
Chipping
Ensure you've sealed the nail tip with the top coat, a commonly missed area prone to early chipping. Additionally, keeping nails short can reduce impact and subsequent chipping.
Stains or Discoloration
Persistent stains may indicate prolonged use of darker polishes without a base coat. Regular nail hydration and occasional nail polish breaks are recommended to keep nails healthy.
A 2026 market study demonstrated that more people opt for nail strengthening treatments, contributing to overall nail health.
Conclusion: Enjoying Your At-Home Manicure
Following these steps, you can ensure a professional-grade manicure from the comfort of home. Not only is this skill cost-effective, but it also allows for endless personalization to match your mood or occasion. By investing time in proper nail care, you'll notice stronger, healthier nails over time.
Remember, practice makes perfect, and every at-home manicure adds to your experience. Stay patient and creative, and enjoy your new self-care routine!